“`html
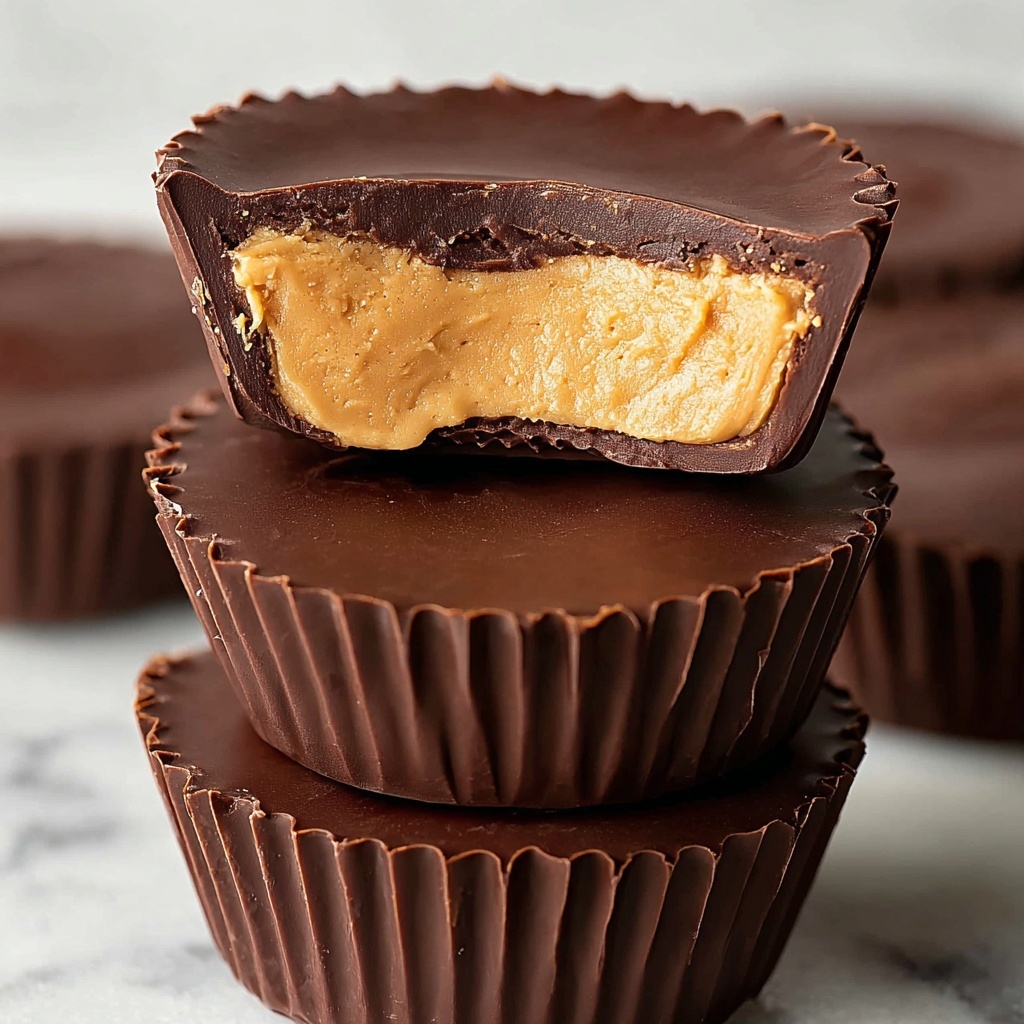
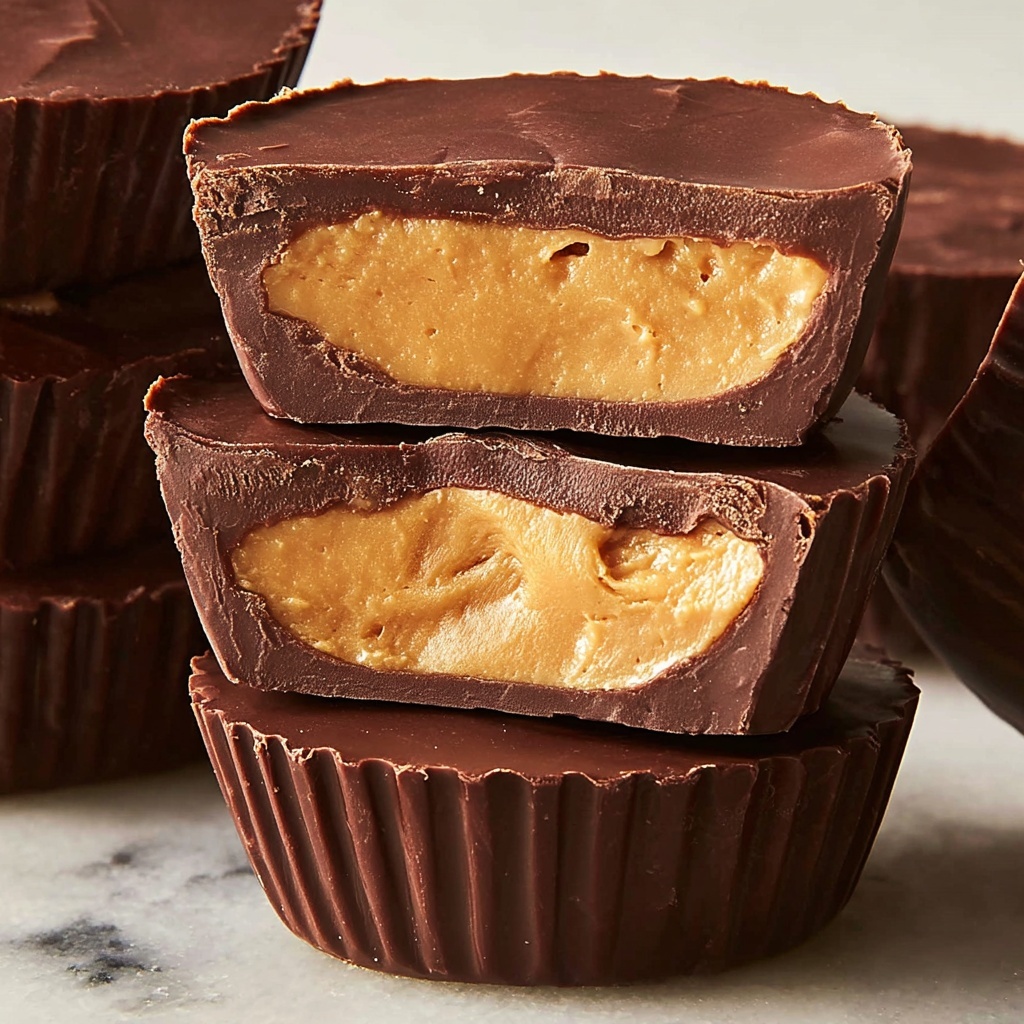
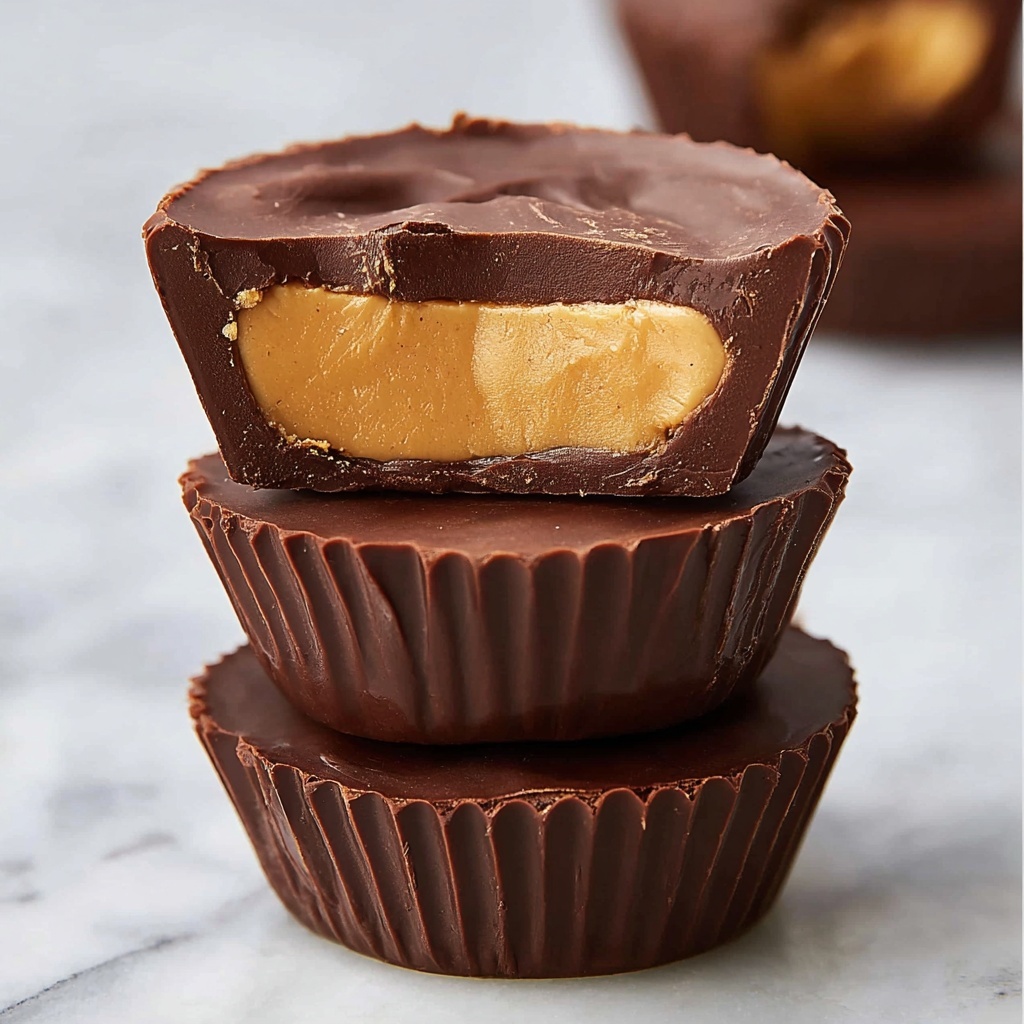
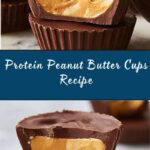
If you have ever dreamed of a delicious treat that satisfies your sweet tooth while giving you a boost of nutrition, this Protein Peanut Butter Cups Recipe is your new best friend. Imagine rich, velvety chocolate wrapped around a creamy, protein-packed peanut butter filling that’s lightly sweetened and perfectly balanced. Whether as a post-workout snack or a guilt-free dessert, these homemade peanut butter cups combine simple ingredients into a mouthwatering delight that’s surprisingly easy to make. Once you try this recipe, you’ll wonder how you ever lived without your own batch of these irresistible treats.
Ingredients You’ll Need
Gathering the right ingredients is the first step toward creating peanut butter cups that are both delicious and nourishing. Each component plays a vital role in delivering that perfect harmony of creamy, sweet, and slightly salty flavors, along with a fantastic texture that melts in your mouth.
- 12 oz semi-sweet chocolate chips: Provides the rich, smooth chocolate coating that’s classic for peanut butter cups.
- 1 teaspoon coconut oil (solid): Helps the chocolate melt easily and gives it a glossy finish.
- 1/4 teaspoon vanilla extract: Adds depth and a subtle sweetness to the chocolate.
- 1/4 cup natural creamy peanut butter (ingredients: peanuts + salt only): The heart of the filling – creamy and packed with flavor.
- 2 tablespoons pure maple syrup: A natural sweetener that complements the peanut butter without overpowering it.
- 1/3 cup vanilla protein powder: Boosts the protein content and adds a mild vanilla flavor for an extra layer of taste.
- 1/4 teaspoon salt: Enhances all the flavors and balances the sweetness beautifully.
How to Make Protein Peanut Butter Cups Recipe
Step 1: Prepare the Muffin Tin
Start by lining a muffin tin with parchment paper muffin liners. This simple step ensures your peanut butter cups won’t stick and makes it easy to pop them out once set. It’s a small prep that pays off in ease and presentation.
Step 2: Melt the Chocolate
Combine the semi-sweet chocolate chips and coconut oil in a microwave-safe bowl. Heat the mixture in 30-second intervals, stirring after each one until the chocolate is fully melted and silky smooth. Stir in the vanilla extract to infuse the chocolate with a lovely aromatic note that’ll elevate your cups.
Step 3: Create the Chocolate Base Layers
Pour a heaping teaspoon of the melted chocolate into each muffin liner, spreading it out evenly to cover the entire bottom. This forms the first chocolate layer that’s the perfect sturdy base for your peanut butter filling.
Step 4: Chill the Chocolate Base
Pop the muffin tin into the refrigerator to firm up the chocolate base. This step helps the structure hold together and prevents the peanut butter filling from mixing with the chocolate prematurely.
Step 5: Make the Peanut Butter Filling
Warm the natural peanut butter slightly in the microwave for about 15 to 20 seconds until it loosens up. Stir in the vanilla protein powder, salt, and pure maple syrup until everything combines into a creamy, luscious mixture that’s ready to be shaped.
Step 6: Assemble Peanut Butter Discs
Divide the peanut butter filling evenly into 12 portions and shape each one into a small disc. Making the discs slightly smaller than the muffin liner allows them to fit comfortably inside without squeezing out the sides.
Step 7: Add Filling to Cups
Retrieve your muffin tin from the fridge and gently place a peanut butter disc on top of each chocolate base. This layering sets the stage for the last chocolate topping layer to lock in all that flavor.
Step 8: Add Remaining Chocolate
If your melted chocolate has thickened, give it another 15 to 20 seconds in the microwave to soften it again. Then drizzle the chocolate over each peanut butter disc, spreading it all the way to the edges. This seals the filling and gives your cups that irresistible glossy top.
Step 9: Chill Until Set
Return the muffin tin to the refrigerator and let the peanut butter cups chill for at least one hour. This step is crucial to get firm, perfectly shaped cups that are easy to handle and heavenly to eat.
Step 10: Serve and Store
Once set, enjoy these delectable treats right away or keep any leftovers in an airtight container in the fridge or freezer for convenient snacking anytime.
How to Serve Protein Peanut Butter Cups Recipe
Garnishes
Enhance your peanut butter cups with a light sprinkle of sea salt for a beautiful salty-sweet contrast, or add crushed peanuts on top before the final chocolate layer sets for extra crunch and visual appeal.
Side Dishes
Pair your Protein Peanut Butter Cups Recipe with a refreshing fruit salad or a dollop of Greek yogurt for a delightful snack combo that balances indulgence with wholesome freshness.
Creative Ways to Present
Try serving these peanut butter cups on a decorative platter lined with parchment paper, or wrap individual cups in colorful cellophane for gifting. You can also create mini versions in mini muffin liners for bite-sized party treats.
Make Ahead and Storage
Storing Leftovers
Store any remaining peanut butter cups in an airtight container in the refrigerator to keep them fresh for up to one week. The chill preserves the texture and flavor, making them just as tempting later as when first made.
Freezing
For longer storage, freeze your peanut butter cups individually wrapped or in a sealed container. They can last up to three months this way. Thaw in the refrigerator before enjoying for the best texture.
Reheating
These cups are best enjoyed cold or at room temperature, so reheating isn’t typically necessary. However, if you prefer slightly softened cups, let them sit out for 10-15 minutes rather than using heat, which can affect the chocolate’s texture.
FAQs
Can I use other types of chocolate?
Absolutely! Dark chocolate or milk chocolate chips work well if you prefer a different flavor profile. Just adjust the sweetness in the filling accordingly.
Is it possible to make these vegan?
Yes, by selecting a plant-based protein powder and ensuring your chocolate chips are dairy-free, you can easily adapt this Protein Peanut Butter Cups Recipe to be vegan-friendly.
Can I substitute peanut butter with other nut butters?
Definitely! Almond butter or cashew butter add a different but equally delicious twist. Just be aware the flavor and texture will vary slightly.
How long do these peanut butter cups last?
When stored properly in the refrigerator, they keep well for about one week. Freezing extends their life up to three months without sacrificing taste.
What if I don’t have a muffin tin?
You can use silicone molds or even a small loaf pan lined with parchment paper. Just adjust the size and chilling time accordingly to suit your container.
Final Thoughts
This Protein Peanut Butter Cups Recipe is one of those treasures that taste indulgent but feel nourishing—perfect for treating yourself or sharing with friends. With easy-to-find ingredients and straightforward steps, you’ll have a batch of these delightful cups ready to brighten your snack time in no time. Go ahead, give it a try and watch how quickly these favorites disappear!
“`
Print
Protein Peanut Butter Cups Recipe
- Prep Time: 20 minutes
- Cook Time: 10 minutes
- Total Time: 1 hour 20 minutes
- Yield: 12 servings
- Category: Dessert
- Method: No-Cook
- Cuisine: American
- Diet: Low Fat
Description
These Protein Peanut Butter Cups are a delicious and healthy twist on a classic treat, combining rich semi-sweet chocolate with a creamy, protein-packed peanut butter filling sweetened naturally with maple syrup. Perfect for a satisfying snack or post-workout indulgence, these cups are easy to make and set in the refrigerator.
Ingredients
Chocolate Base
- 12 oz semi-sweet chocolate chips
- 1 teaspoon solid coconut oil
- 1/4 teaspoon vanilla extract
Peanut Butter Filling
- 1/4 cup natural creamy peanut butter (ingredients: peanuts + salt only)
- 2 tablespoons pure maple syrup
- 1/3 cup vanilla protein powder
- 1/4 teaspoon salt
Instructions
- Prepare the Muffin Tin: Line a muffin tin with parchment paper muffin liners to prevent sticking and make removal easier once the peanut butter cups are set.
- Melt the Chocolate: Place the chocolate chips and solid coconut oil in a microwave-safe bowl. Microwave in 30-second intervals, stirring after each, until completely melted and smooth. Stir in the vanilla extract to flavor the chocolate.
- Create Chocolate Base Layers: Spoon about 1 heaping teaspoon of the melted chocolate into each muffin liner, spreading it evenly to the edges to create a flat base layer.
- Chill the Chocolate: Refrigerate the muffin tin to allow the chocolate base layers to set firmly before adding the filling.
- Make the Peanut Butter Filling: Warm the peanut butter briefly in the microwave (15–20 seconds) until runny. Combine it with vanilla protein powder, maple syrup, and salt, stirring thoroughly to form a smooth and creamy mixture.
- Assemble Peanut Butter Discs: Divide the prepared peanut butter filling into 12 equal portions. Shape each portion into a disc slightly smaller than the muffin liner for easy layering.
- Add Filling to Cups: Remove the muffin tin from the fridge. Place one peanut butter disc on top of the set chocolate base in each liner.
- Add Remaining Chocolate: If the leftover melted chocolate has thickened, gently microwave it for 15–20 seconds to soften. Drizzle and spread the chocolate over each peanut butter disc to seal the filling inside.
- Chill Until Set: Return the muffin tin to the refrigerator and chill for at least one hour until the peanut butter cups are completely firm.
- Serve and Store: Enjoy immediately or store the peanut butter cups in an airtight container in the refrigerator or freezer for convenient snacking later.
Notes
- Ensure peanut butter is runny to mix evenly with protein powder and maple syrup.
- Melt chocolate gently to avoid burning by stirring frequently during microwaving.
- Use parchment liners for easy removal and less mess.
- Store peanut butter cups in the fridge to keep them firm, or freeze for longer storage.