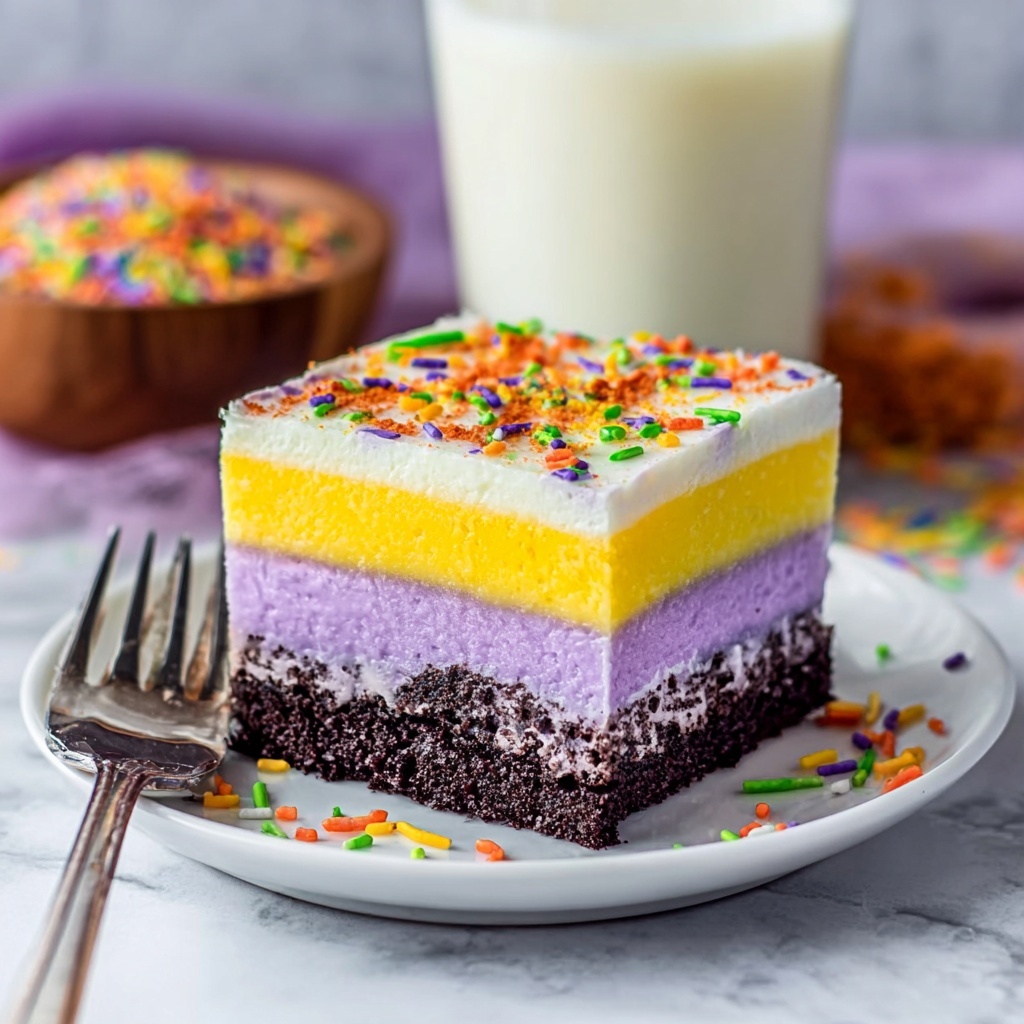
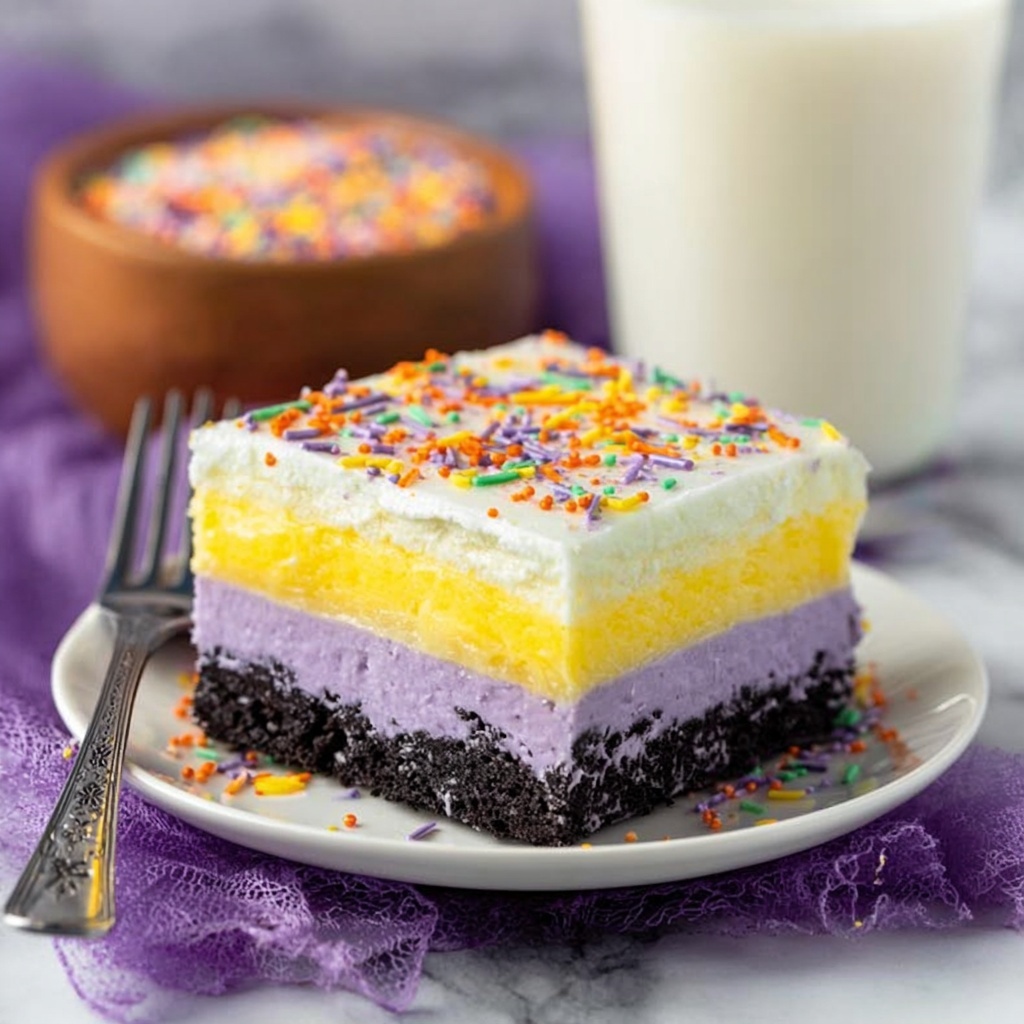
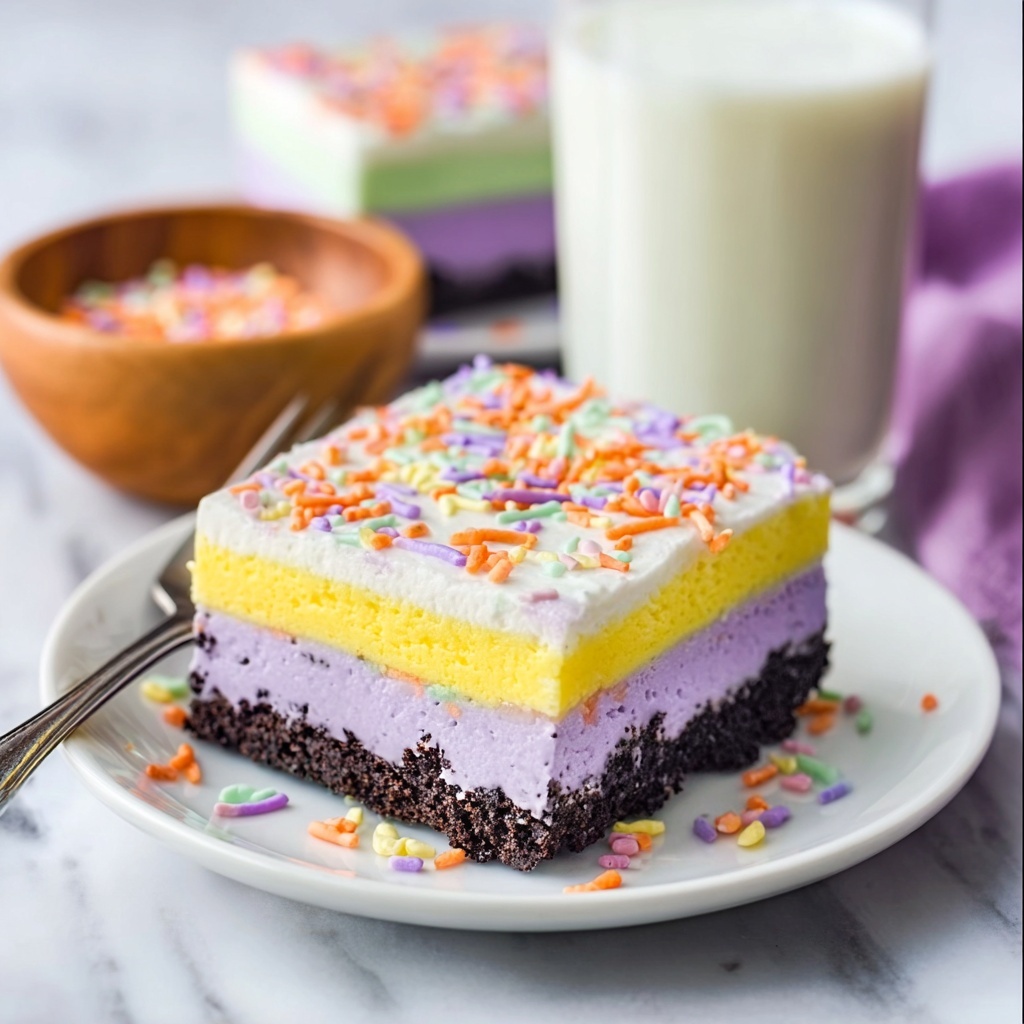
If you’re dreaming of a dessert that perfectly captures the fun and festive spirit of the season, you have to try this Halloween Lush Dessert Recipe. It’s a layered no-bake treat that combines a crunchy chocolate cookie crust, a creamy tangy cream cheese layer, and luscious chocolate vanilla pudding all topped with fluffy whipped topping and colorful Halloween decorations. Every bite is a symphony of textures and flavors that will delight both kids and adults, making it the ultimate centerpiece for any Halloween celebration or cozy autumn gathering.
Ingredients You’ll Need
Gathering your ingredients is super straightforward. Each one plays a crucial role in building the rich, creamy, and festive layers of this Halloween Lush Dessert Recipe, from the chocolate cookie crust providing a satisfying crunch to the smooth pudding and fluffy whipped topping adding sweetness and lightness.
- Chocolate sandwich cookies (20): Crushed to form a crunchy, chocolatey base that’s irresistible and easy to press into the pan.
- Unsalted butter (4 tablespoons): Melted to bind the cookie crumbs, creating a solid crust that holds everything together.
- Cream cheese (8 ounces, softened): The creamy layer’s star ingredient, it gives tanginess and richness.
- Powdered sugar (1 cup): Sweetens the cream cheese layer without any graininess for a smooth finish.
- Whipped topping (3 cups total): Adds lightness and fluffiness to both the cream cheese layer and the topping.
- Instant chocolate pudding mix (3.4-ounce box): For the deep chocolate flavor in the pudding layer.
- Instant vanilla pudding mix (3.4-ounce box): Balances the chocolate with sweetness and creaminess.
- Cold milk (3 cups): Essential for setting the pudding perfectly.
- Halloween sprinkles, candy eyes, crushed cookies, or candy corn: To decorate the top with festive flair and fun textures.
How to Make Halloween Lush Dessert Recipe
Step 1: Prepare the Chocolate Cookie Crust
Start by crushing those chocolate sandwich cookies until you have fine crumbs. Mixing them with melted butter is the magic that brings it all together. Press this mixture evenly into the bottom of a 9×9-inch dish—this will be the crunchy, chocolaty foundation that gives your dessert structure and flavor. Pop it in the fridge for about 10 minutes to firm up so the layers stay distinct and perfect.
Step 2: Make the Cream Cheese Layer
Next up, beat the softened cream cheese and powdered sugar until it’s silky smooth with no lumps in sight. Fold in one cup of whipped topping gently to keep it light and fluffy. This layer brings a tangy creaminess that contrasts beautifully with the sweet chocolate crust below and the pudding on top. Spread this dreamy mixture evenly over the chilled cookie crust for that perfect middle layer.
Step 3: Whisk the Pudding Mixtures
In another bowl, whisk together both the chocolate and vanilla instant pudding mixes with the cold milk. Within a couple of minutes, you’ll have thick, velvety pudding that tastes like a chocolate lover’s dream with a creamy vanilla swirl. Spread this onto the cream cheese layer carefully to create a luscious third layer of flavor that’ll keep everyone coming back for more.
Step 4: Add the Whipped Topping and Decorate
Top everything off with the remaining whipped topping for that soft, snowy look that screams Halloween fun. Now comes the best part: decoration! Sprinkle on Halloween sprinkles, candy eyes, crushed cookies, or candy corn to bring your dessert to life with color and whimsy. Refrigerate this masterpiece for at least two hours so all the layers set perfectly and the flavors meld into pure deliciousness.
How to Serve Halloween Lush Dessert Recipe
Garnishes
When it comes to garnishes, think playful and colorful. Halloween sprinkles add festive pops of orange, black, and purple, while candy eyes bring a cute spookiness that kids adore. Crushed cookies give an extra crunch, and candy corn offers a nostalgic sweetness perfect for fall. These embellishments not only impress visually but also add delightful textures that make every bite interesting.
Side Dishes
This dessert is a rich treat, so pairing it with light, refreshing side dishes works well. A crisp apple slices platter, a small bowl of fresh berries, or even a sparkling autumn punch can balance the creaminess of the Halloween Lush Dessert Recipe perfectly without overwhelming the palate.
Creative Ways to Present
Presentation can elevate this dessert from delicious to unforgettable. Try serving individual portions in clear glass cups to showcase the beautiful layers. You could also use themed Halloween containers or create mini servings in cupcake liners decorated with festive picks. For parties, slicing into squares on a decorative platter surrounded by fall leaves or tiny pumpkins instantly amps up the seasonal vibe.
Make Ahead and Storage
Storing Leftovers
Halloween Lush Dessert Recipe keeps wonderfully in the refrigerator for up to three days. Cover tightly with plastic wrap or transfer to an airtight container to maintain freshness and moisture. The flavors will continue to meld, often tasting even better the next day.
Freezing
You can freeze this dessert, but be aware that whipped toppings and pudding textures may slightly change upon thawing. Wrap individual portions tightly or the whole dish in plastic wrap and aluminum foil for up to one month. Thaw overnight in the fridge before serving for best results.
Reheating
This dessert is meant to be served chilled, so skip reheating. Simply let frozen portions thaw naturally in the refrigerator. If you want a softer texture, give it a gentle stir after thawing, but keep it cold to enjoy the intended creamy, refreshing experience.
FAQs
Can I use a different type of cookie for the crust?
Absolutely! While chocolate sandwich cookies like Oreos provide a classic flavor, you can experiment with other chocolate cookies or even spiced cookies for an extra festive twist. Just be sure the cookies are finely crushed to bind well with the butter.
Is there a way to make this recipe nut-free?
Yes! This Halloween Lush Dessert Recipe is naturally nut-free if you avoid toppings containing nuts. Stick to nut-free whipped toppings and decorations to keep it safe for everyone to enjoy.
Can I make this dessert vegan?
You could adapt the recipe by using dairy-free cream cheese, vegan whipped toppings, and pudding mixes made with plant-based milk. Be sure to check ingredient labels carefully to keep it vegan-friendly.
How far in advance can I prepare this dessert?
It’s perfect for making a day or two ahead of time. Just store it covered in the refrigerator, and the layers will have time to set beautifully while flavors meld together, making it even more delicious.
Can I add food coloring to make it more Halloween-themed?
Definitely! Tinting the whipped topping or pudding with orange, green, or purple food coloring adds to the spooky fun and lets you personalize your Halloween Lush Dessert Recipe. Just add a few drops until you reach your desired shade.
Final Thoughts
I can’t recommend this Halloween Lush Dessert Recipe enough for your seasonal celebrations. It’s simple to whip together, delightfully indulgent, and full of whimsy that makes Halloween extra special. Whether you’re hosting a party or just want a festive treat to enjoy at home, this lush dessert is sure to become a beloved tradition. So grab your ingredients, get creative with toppings, and savor every delicious layer!
Print
Halloween Lush Dessert Recipe
- Prep Time: 20 minutes
- Cook Time: 0 minutes
- Total Time: 2 hours 20 minutes
- Yield: 9 servings
- Category: Dessert
- Method: No-Cook
- Cuisine: American
- Diet: Vegetarian
Description
This Halloween Lush Dessert is a festive, no-bake layered treat perfect for spooky celebrations. It features a chocolate cookie crust, a creamy sweetened cream cheese layer, dual-flavored chocolate and vanilla pudding, and a fluffy whipped topping adorned with fun Halloween decorations. Easy to prepare and delicious, it’s ideal for parties and family gatherings.
Ingredients
Crust:
- 20 chocolate sandwich cookies (like Oreos), crushed
- 4 tablespoons unsalted butter, melted
Cream Cheese Layer:
- 8 ounces cream cheese, softened
- 1 cup powdered sugar
- 1 cup whipped topping (like Cool Whip)
Pudding Layer:
- 1 (3.4-ounce) box instant chocolate pudding mix
- 1 (3.4-ounce) box instant vanilla pudding mix
- 3 cups cold milk
Topping:
- 2 cups whipped topping
- Halloween sprinkles, candy eyes, crushed cookies, or candy corn for decorating
Instructions
- Prepare the crust: In a bowl, combine the crushed chocolate sandwich cookies with the melted butter until the mixture is well incorporated. Press this cookie mixture evenly into the bottom of a 9×9-inch dish to form the crust. Chill the crust in the refrigerator for 10 minutes to set.
- Make the cream cheese layer: In a separate bowl, beat the softened cream cheese together with the powdered sugar until the mixture is smooth and creamy. Gently fold in 1 cup of whipped topping to lighten the layer. Spread this cream cheese mixture evenly over the chilled cookie crust.
- Prepare the pudding layer: In another bowl, whisk together the instant chocolate and vanilla pudding mixes with the cold milk until the pudding thickens, about 2 minutes. Carefully spread the pudding layer over the cream cheese layer to create a smooth, even surface.
- Add the topping and decorate: Spread the remaining 2 cups of whipped topping evenly over the pudding layer. Decorate the top with Halloween sprinkles, candy eyes, crushed cookies, or candy corn as desired to create a festive look.
- Chill before serving: Refrigerate the assembled dessert for at least 2 hours to allow the layers to set fully and flavors to meld. Serve chilled, cut into 9 squares.
Notes
- To make it spookier, tint the whipped topping or pudding layers with orange or green food coloring before assembling.
- For a nut-free version, avoid using toppings that contain nuts or nut-based candies.
- This dessert can be assembled a day in advance and kept refrigerated, making it ideal for party prep.
- Use full-fat cream cheese and whipped topping for the creamiest texture.

