
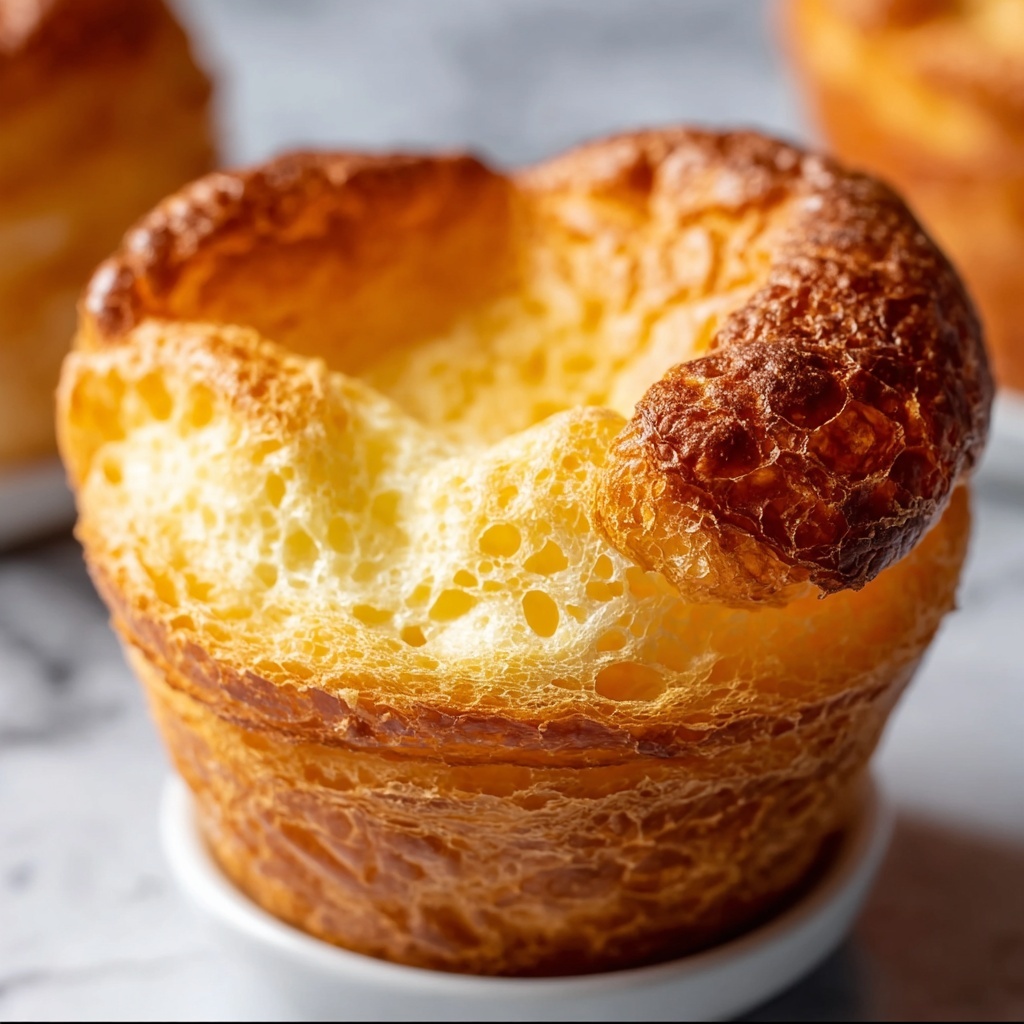
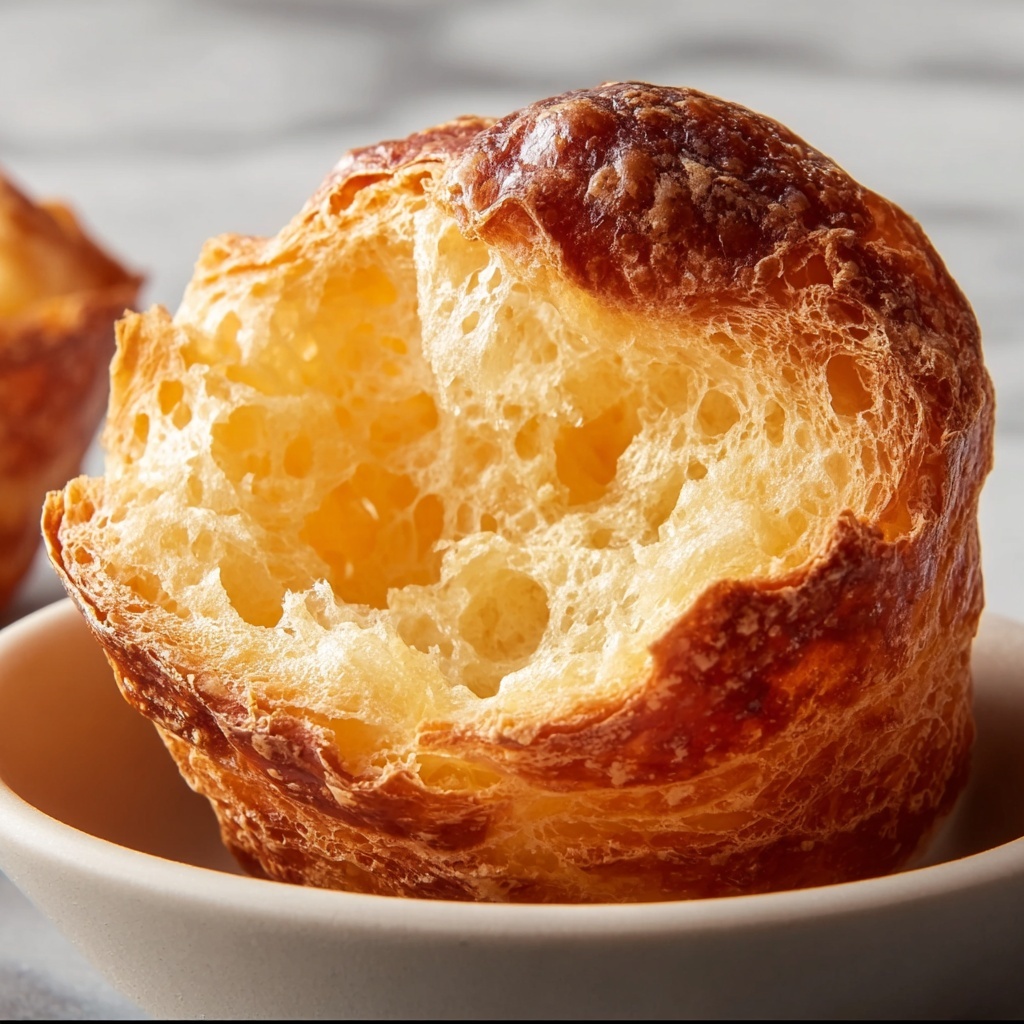
If you’ve ever wanted to wow your friends and family with a light, airy, and irresistibly golden bread that feels like a little cloud of joy on a plate, then you’re in the right place. This Classic Popovers Recipe captures the magic of simple ingredients transformed by high heat into beautifully puffed, crispy-edged delights perfect for breakfast, brunch, or dinner. It’s a dish that’s as fun to make as it is to eat, and once you master this timeless recipe, these stunning popovers will undoubtedly become a cherished staple in your kitchen.
Ingredients You’ll Need
Before diving into the kitchen, it’s wonderful to appreciate just how straightforward and accessible the ingredients are. Each one plays a vital role—creating a batter that puffs up dramatically and browns beautifully, with a tender interior that melts in your mouth.
- 1 cup all-purpose flour: The foundation for structure, giving the popovers their essential lightness and crumble.
- 1 cup whole milk (room temperature): Adds moisture and richness; using it at room temperature ensures smooth batter and better rise.
- 2 large eggs (room temperature): Eggs bring lift and richness, helping the popovers puff up and stay tender.
- 1/2 teaspoon salt: Enhances all the flavors and balances the sweetness just right.
- 1 tablespoon unsalted butter (melted, plus more for greasing): Adds decadent flavor and helps create a golden, crisp exterior.
How to Make Classic Popovers Recipe
Step 1: Preheat and Prepare Your Pan
Start by preheating your oven to a blazing 450°F (230°C). While the oven heats, place your popover pan or a standard muffin tin inside. A hot pan is key—it helps the batter jump to life the moment it hits the metal, creating those signature popover bubbles that make this recipe so special.
Step 2: Mix the Dry Ingredients
In a mixing bowl, whisk together the all-purpose flour and salt until evenly combined. This simple step ensures the salt is dispersed well, enhancing the overall flavor subtly but effectively.
Step 3: Blend the Wet Ingredients
In a separate bowl, whisk together the room-temperature eggs and milk until the mixture is smooth and homogenous. Combining the wet ingredients separately allows you to pour them slowly into the flour, resulting in a silky batter without lumps.
Step 4: Combine and Add Butter
Gradually add the wet mixture to the dry, whisking continuously until your batter becomes smooth and shiny. Finally, fold in the melted butter gently, enriching the batter and improving its texture. Let the batter rest for 10 to 15 minutes; this brief pause helps the flour hydrate fully and the gluten relax, which is crucial for a perfect rise.
Step 5: Fill the Hot Pan and Bake
Pull out that hot pan from the oven carefully and grease each cup generously with butter. This coating not only prevents sticking but also contributes to a beautifully crispy bottom crust. Spoon the batter into each cup halfway—filling them too much might cause spillover. Bake initially at 450°F for 15 minutes without opening the oven, ensuring the popovers rise properly.
Step 6: Lower Temperature and Continue Baking
Once the initial burst of heat has puffed your popovers up, reduce the oven temperature to 350°F (175°C). Continue baking for 15 to 20 more minutes until they are a rich golden brown and perfectly puffed. This slower baking phase finishes cooking the inside without burning the exterior.
Step 7: Release Steam and Serve Warm
When you remove your stunning popovers from the oven, gently pierce each one with a knife or skewer to release built-up steam. Serving them warm is essential—this is when they taste their freshest, lightest, and most delicious. Now get ready to enjoy!
How to Serve Classic Popovers Recipe
Garnishes
A simple smear of butter or a dollop of fruit jam is all these popovers truly need to shine. For a savory twist, herbs like chives or a sprinkle of grated cheese can elevate the experience wonderfully. The key is to keep garnishes light so the popovers’ airy texture remains the star.
Side Dishes
Classic popovers are the perfect sidekick to any meal. Pair them with soups, especially creamy ones like tomato bisque or butternut squash, or alongside roasts where their crispy edges and soft interiors contrast beautifully with juicy meats. They also make a charming accompaniment to breakfast spreads with eggs and smoked salmon.
Creative Ways to Present
For a special occasion, try hollowing out popovers slightly and filling them with savory salads or creamy chicken salad for an inventive appetizer. Alternatively, serve them as mini baskets filled with sweet whipped cream and fresh berries for a delightful dessert. The versatility of the Classic Popovers Recipe truly knows no bounds.
Make Ahead and Storage
Storing Leftovers
If you have leftovers, store them in an airtight container at room temperature for up to 1 day. Their crispness might soften over time, but the tender interior remains delightful enough for a quick snack or accompaniment to soup the next day.
Freezing
Popovers freeze well when wrapped tightly in foil and placed inside a freezer bag. They will keep nicely for up to a month. Freezing is a great way to prepare in advance and enjoy fresh-tasting popovers whenever the craving hits.
Reheating
To happily revive your stored or frozen popovers, reheat them in a 350°F oven for about 5 to 10 minutes. This restores their wonderful crisp outer shell while warming them through, maintaining the integrity of the Classic Popovers Recipe and keeping them as delicious as when first baked.
FAQs
Why do popovers need a very hot oven?
The initial high heat creates steam rapidly inside the batter, which causes the popovers to puff up dramatically and develop their characteristic hollow center and crisp exterior. Without the hot oven, they’d turn out flat and dense.
Can I use milk substitutes in this Classic Popovers Recipe?
While whole milk gives the best richness and flavor, you can substitute with unsweetened almond milk or soy milk if needed. Keep in mind that the texture might be slightly less tender but still tasty.
Why is it important to let the batter rest before baking?
Allowing the batter to rest hydrates the flour properly and relaxes gluten strands, which results in a smoother batter and better rise, ensuring your popovers puff up perfectly and have a tender crumb.
Can I make popovers without a special popover pan?
Absolutely! A standard muffin tin works well. Just grease the cups thoroughly and follow the same baking steps to achieve excellent results.
What causes popovers to collapse after baking?
Popovers can deflate if the oven door is opened too early, because the sudden drop in heat lets steam escape quickly. Also, under-baking can leave too much moisture inside, causing them to fall. Following the bake time and temperature closely prevents this from happening.
Final Thoughts
Making this Classic Popovers Recipe is a joyful kitchen adventure that pays off with delicate, golden beauties perfect for any meal. Once you try them fresh from your oven, you’ll understand why they’ve stood the test of time. Don’t hesitate to make this recipe your own and share it widely—it’s a spontaneous crowd-pleaser that brings warmth and smiles to every table.
Print
Classic Popovers Recipe
- Prep Time: 10 minutes
- Cook Time: 35 minutes
- Total Time: 45 minutes
- Yield: 6 popovers
- Category: Bread, Side
- Method: Baking
- Cuisine: American
- Diet: Vegetarian
Description
Classic Popovers are light, airy rolls made with simple ingredients and baked to golden perfection. Perfect as a breakfast treat or a savory side, these popovers have a crisp exterior and a tender, hollow interior that’s ideal for pairing with butter, jam, or soups.
Ingredients
Dry Ingredients
- 1 cup all-purpose flour
- 1/2 teaspoon salt
Wet Ingredients
- 1 cup whole milk (at room temperature)
- 2 large eggs (at room temperature)
- 1 tablespoon unsalted butter, melted (plus more for greasing pan)
Instructions
- Preheat Oven: Preheat your oven to 450°F (230°C) and place a popover pan or standard muffin tin inside while it heats to get it nice and hot.
- Mix Dry Ingredients: In a bowl, whisk together the all-purpose flour and salt to evenly distribute the seasoning.
- Combine Wet Ingredients: In a separate bowl, whisk the eggs and room temperature whole milk until fully blended and smooth.
- Create Batter: Slowly pour the wet ingredients into the dry ingredients, whisking continuously until the batter is smooth without lumps. Stir in the melted butter gently.
- Rest Batter: Allow the batter to rest for 10–15 minutes to improve texture while the oven completes preheating.
- Prepare Pan: Carefully remove the hot pan from the oven and grease each cup thoroughly with butter to prevent sticking and promote browning.
- Fill Cups: Fill each cup about halfway with batter to allow room for puffing during baking.
- Bake High Heat: Bake the popovers at 450°F (230°C) for 15 minutes without opening the oven door to create steam and enable maximum rise.
- Reduce Heat and Continue Baking: Lower the oven temperature to 350°F (175°C) and bake for an additional 15–20 minutes until popovers are deep golden brown and fully puffed.
- Release Steam and Serve: Remove the popovers from the oven and gently pierce each one with a knife to release the trapped steam. Serve warm for best flavor and texture.
Notes
- Use room-temperature ingredients to achieve optimal batter consistency and rise.
- Do not open the oven door during baking to prevent popovers from collapsing.
- Popovers are delicious served with butter and jam for breakfast or as a savory side alongside soups and roasts.


