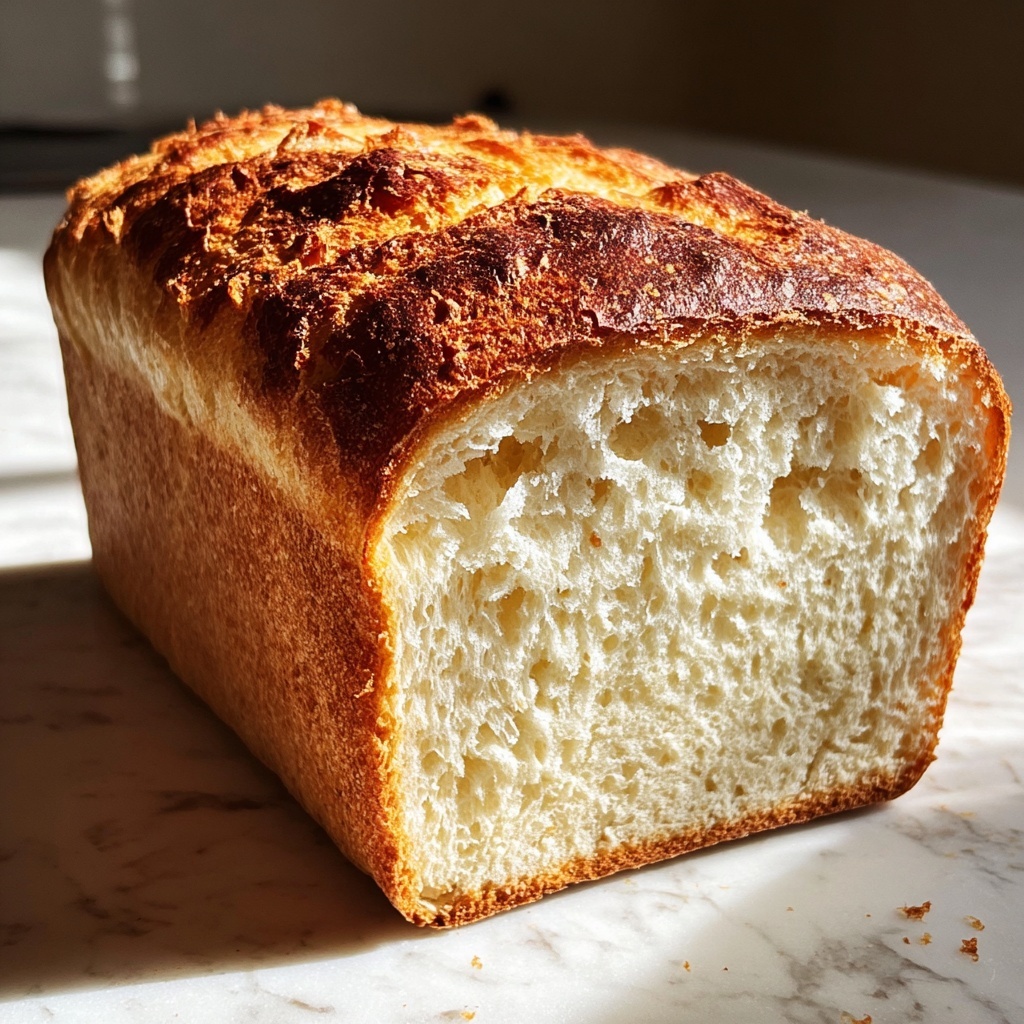
If you’ve been searching for a delicious, trustworthy loaf that fits your dietary needs without sacrificing flavor or texture, look no further than this Classic White Gluten-Free Sandwich Bread Recipe. It’s soft, airy, and perfectly tender, making it the ideal base for everything from a simple buttered toast to an epic sandwich stacked high with your favorite fillings. Whether you’re new to gluten-free baking or a seasoned pro, this recipe brings together straightforward ingredients to create a loaf that truly feels like homemade comfort wrapped in a gluten-free package.
Ingredients You’ll Need
The beauty of the Classic White Gluten-Free Sandwich Bread Recipe lies in its simplicity. Each ingredient plays a vital role—from providing structure and flavor to ensuring the crumb is just right—making the ingredient list easy to master and approachable for any baker.
- 2 cups gluten-free all-purpose flour: The foundation of the bread, ensuring it’s light while gluten-free.
- 1 tablespoon sugar: Adds just a hint of sweetness to balance flavors and helps activate the yeast.
- 1 teaspoon salt: Enhances all the flavors without overpowering the bread.
- 1 tablespoon active dry yeast: The magic that makes the dough rise, giving you a tender, airy crumb.
- 1 cup warm water: Activates the yeast and hydrates the flour for perfect dough consistency.
- 2 tablespoons olive oil: Adds moisture and a subtle richness that keeps the bread soft longer.
- 2 eggs: Provide structure and contribute to a golden crust and tender texture.
How to Make Classic White Gluten-Free Sandwich Bread Recipe
Step 1: Prepare Your Oven and Loaf Pan
Start by preheating your oven to 375°F (190°C) to ensure it’s at the perfect temperature when your dough is ready. Grease your loaf pan thoroughly with oil or butter to prevent sticking, so your beautifully baked bread slides out effortlessly.
Step 2: Mix the Dry Ingredients
In a large mixing bowl, whisk together the gluten-free all-purpose flour, sugar, salt, and active dry yeast. This step is key for evenly distributing the yeast and seasonings, which helps the bread develop a consistent rise and balanced flavor.
Step 3: Combine the Wet Ingredients
Add the warm water, olive oil, and eggs to the dry mix. Stir everything together until you form a smooth, cohesive dough. Don’t worry if the dough feels a bit stickier than traditional wheat-based dough—that’s typical with gluten-free flours and ensures a soft crumb.
Step 4: Shape the Dough in the Pan
Transfer your dough directly into the greased loaf pan and use a spatula to smooth the top evenly. This helps your bread bake uniformly and develop a lovely, even crust.
Step 5: Bake to Golden Perfection
Place the loaf pan in your preheated oven and bake for about 40 minutes. Keep an eye out for that beautiful golden brown color on top, and give it a gentle tap—the hollow sound is your signal that the bread has baked through perfectly.
Step 6: Cool Before Slicing
Once out of the oven, let the bread cool in the pan for 10 minutes. This brief rest allows the loaf to set before you carefully transfer it to a wire rack to cool completely. Slicing into warm bread can lead to crumbly slices, so patience really pays off here.
How to Serve Classic White Gluten-Free Sandwich Bread Recipe
Garnishes
This bread is fantastic just as it is, but you can elevate your slices with a sprinkle of seeds like sesame or poppy on top before baking for added crunch and a little visual flair. A swipe of herb butter or a drizzle of honey can take each bite to the next level.
Side Dishes
The tender texture and mild flavor of this sandwich bread pairs wonderfully with fresh salads, hearty soups, or creamy dips. It’s also fantastic alongside egg dishes, roasted vegetables, or as a sturdy base for an open-faced sandwich piled high with your favorite toppings.
Creative Ways to Present
Turn this loaf into a fun centerpiece by slicing it thick for French toast or thick sandwiches. Try toasting it and topping with avocado and smoked salmon or layering it for a gluten-free club sandwich with layers of turkey, bacon, lettuce, and tomato. The possibilities are endless!
Make Ahead and Storage
Storing Leftovers
Keep your leftover bread in an airtight container or wrapped tightly in plastic wrap at room temperature for up to three days. This helps maintain its soft texture while preventing it from drying out.
Freezing
If you want to extend your bread’s life, slice it first and then freeze your portions in a freezer-safe bag. This way, you can take out as many slices as you need without thawing the whole loaf, making it super convenient for busy mornings or last-minute meals.
Reheating
To revive your bread’s fresh-baked charm, toast frozen slices directly or warm whole slices in the oven at a low temperature. Avoid microwaving if possible, as it can cause sogginess or a rubbery texture.
FAQs
Can I substitute the olive oil for another type of oil?
Absolutely! You can use melted coconut oil, avocado oil, or even a mild vegetable oil. Just be aware that some oils may slightly alter the flavor of the bread.
Is it necessary to use eggs in this recipe?
Eggs help with the structure and softness of the bread, but if you prefer an egg-free version, try using flax eggs or a commercial egg replacer to maintain moisture and binding.
Can I use a gluten-free flour blend that contains xanthan gum?
Yes, just check if your blend already contains xanthan gum. If it does, you don’t need to add more. Your bread should still turn out beautifully tender and well-structured.
How do I know if the yeast is still good?
To test your yeast, dissolve it in warm water with a pinch of sugar and wait about 10 minutes. If it bubbles and foams, your yeast is active and ready to use.
Can I make this bread dairy-free?
This recipe is naturally dairy-free since it uses olive oil and eggs, so it’s perfect if you’re avoiding dairy but still want a rich, comforting loaf.
Final Thoughts
This Classic White Gluten-Free Sandwich Bread Recipe is a genuine game-changer for anyone craving soft, fresh homemade bread without gluten. It’s approachable, reliable, and endlessly versatile, making it a must-try for your next baking adventure. Give it a shot—you might just find your new favorite loaf!
Print
Classic White Gluten-Free Sandwich Bread Recipe
- Prep Time: 10 minutes
- Cook Time: 40 minutes
- Total Time: 55 minutes
- Yield: 1 loaf (about 8 servings)
- Category: Bread
- Method: Baking
- Cuisine: American
- Diet: Gluten Free
Description
This Classic White Sandwich Bread recipe creates a soft, gluten-free loaf perfect for everyday sandwiches. Made with simple ingredients including gluten-free flour, eggs, and olive oil, it’s a delicious and easy-to-make bread that bakes to a golden brown crust with a tender crumb.
Ingredients
Main Ingredients
- 2 cups gluten-free all-purpose flour
- 1 tablespoon sugar
- 1 teaspoon salt
- 1 tablespoon active dry yeast
- 1 cup warm water
- 2 tablespoons olive oil
- 2 eggs
Instructions
- Preheat and Prepare Pan: Preheat your oven to 375°F (190°C) and grease a loaf pan to prevent sticking during baking.
- Mix Dry Ingredients: In a large mixing bowl, combine the gluten-free all-purpose flour, sugar, salt, and active dry yeast, ensuring even distribution.
- Add Wet Ingredients and Form Dough: Pour in the warm water, olive oil, and eggs to the dry mixture. Stir vigorously until a smooth, cohesive dough forms with no dry spots.
- Transfer to Pan: Spoon the dough into the greased loaf pan and use a spatula to smooth the surface evenly for uniform baking.
- Bake the Bread: Place the loaf pan in the preheated oven and bake for 40 minutes, or until the bread turns a golden brown color and sounds hollow when tapped, indicating it is fully cooked.
- Cool the Bread: Remove the loaf from the oven and let it cool in the pan for 10 minutes to set. Then transfer it onto a wire rack to cool completely before slicing, preserving its texture.
Notes
- Make sure the water is warm, not hot, to activate the yeast without killing it.
- Use gluten-free flour blend that contains xanthan gum for best results if your blend doesn’t already include it.
- Allow the bread to cool completely before slicing to avoid a gummy texture.
- This bread can be stored in an airtight container for up to 3 days or frozen for longer storage.
- Check the loaf at 35 minutes and lightly cover with foil if the crust browns too quickly.


