
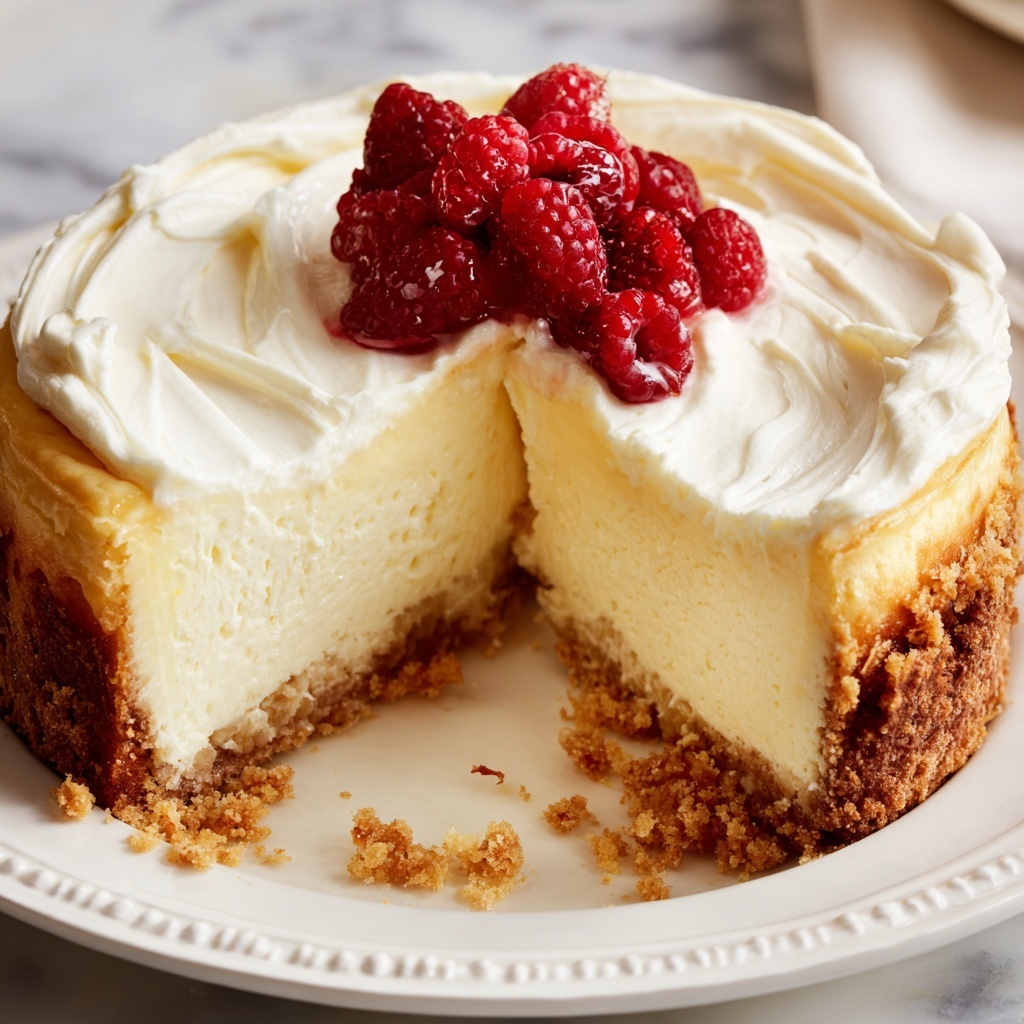
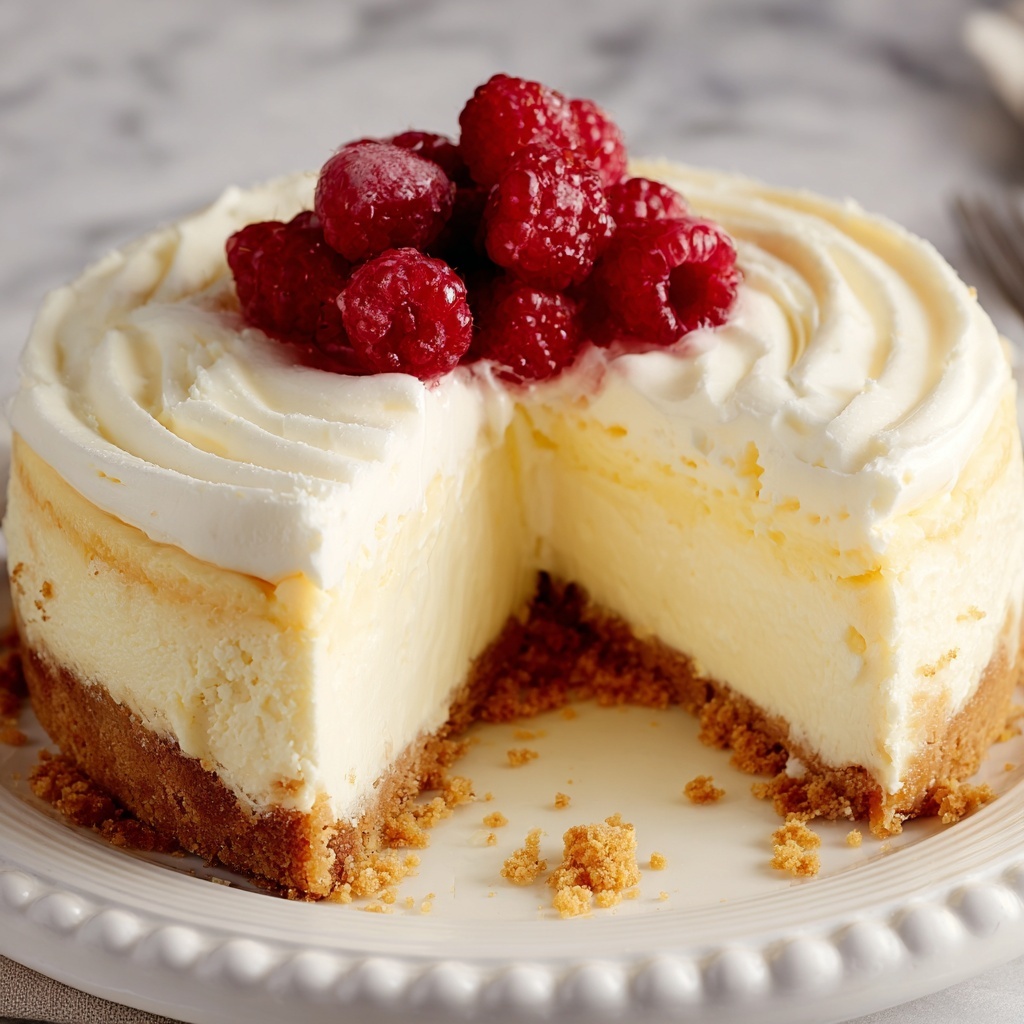
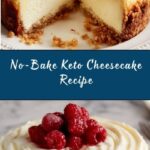
If you’re looking for a dessert that feels indulgent but perfectly fits your low-carb lifestyle, this No-Bake Keto Cheesecake Recipe is about to become your new best friend. Creamy, rich, and delightfully smooth, this cheesecake skips the oven and fuss, yet delivers on every bit of flavor you crave. With a buttery almond flour crust and a luscious cream cheese filling sweetened just right, it’s a treat you can enjoy any time without breaking your keto goals or your spirit. Trust me, once you try this, your dessert rotation will never be the same!
Ingredients You’ll Need
This recipe calls for simple but powerful ingredients that each play a vital role in creating that perfect balance of taste and texture. From the crunchy base to the silky filling, every component is chosen to keep the cheesecake keto-friendly while making it incredibly delicious and satisfying.
- Almond flour: Provides a nutty, gluten-free crust that is both crunchy and keto-approved.
- Butter, melted: Binds the crust ingredients together and adds rich flavor.
- Erythritol: A natural, zero-carb sweetener that keeps the cheesecake perfectly sweet without any sugar spike.
- Cream cheese, softened: The star ingredient offering that signature creamy texture and tangy richness.
- Heavy cream: Whipped into the filling, it lends smoothness and lightness that melt in your mouth.
- Vanilla extract: Adds a warm, aromatic note to elevate the flavor profile.
How to Make No-Bake Keto Cheesecake Recipe
Step 1: Prepare the Crust
Start by combining the almond flour, melted butter, and 1 tablespoon of erythritol in a mixing bowl. Stir everything together until the mixture sticks together like wet sand—this is crucial for a crust that holds firm when chilled. Then press this mixture firmly into the base of a 9-inch pie dish or cheesecake pan. Pop it into the fridge to let it set as you move on to the filling.
Step 2: Make the Creamy Filling
In a separate bowl, beat together the softened cream cheese, heavy cream, 1/2 cup erythritol, and vanilla extract until the mixture becomes smooth, creamy, and silky. This step is where the magic happens, turning the rich ingredients into a luscious filling that will make every bite feel like a special occasion.
Step 3: Assemble and Chill
Pour the cream cheese filling over your chilled crust, spreading it evenly so every slice will have the perfect balance of crust and filling. Refrigerate the entire cheesecake for 3 to 4 hours until it sets firmly. This chilling step allows the flavors to meld and the texture to solidify into that beautiful creamy consistency you crave.
How to Serve No-Bake Keto Cheesecake Recipe
Garnishes
While this cheesecake truly shines on its own, adding fresh raspberries, strawberries, or a dollop of sugar-free whipped cream can bring a fresh burst of flavor and color that makes it even more inviting. Nuts or a sprinkle of cocoa powder work well too, especially if you want a bit of crunch or a touch of chocolatey depth.
Side Dishes
Keeping things keto-friendly doesn’t mean boring side choices. This cheesecake pairs wonderfully with a light, fresh mint tea or a cup of black coffee. For something a little more decadent, try it alongside a few slices of keto-friendly berries or a small serving of dark chocolate with high cocoa content.
Creative Ways to Present
For a fun twist, serve individual portions in small glass jars or ramekins, layering crust and filling for a beautiful presentation. You can also drizzle a little sugar-free caramel or drizzle of melted sugar-free chocolate over each slice. This No-Bake Keto Cheesecake Recipe is versatile enough to dress up or keep simple depending on the occasion.
Make Ahead and Storage
Storing Leftovers
Once your cheesecake is made, keep any leftovers tightly covered in the refrigerator. It will stay fresh and creamy for up to 4 days—perfect for enjoying small slices throughout the week without losing any of its delightful texture or flavor.
Freezing
This cheesecake freezes wonderfully. For best results, cover it well with plastic wrap and a layer of foil to prevent freezer burn. You can store it frozen for up to one month. When ready to enjoy, thaw it overnight in the fridge for a smooth, creamy texture that tastes just like freshly made.
Reheating
Since this is a no-bake cheesecake, reheating isn’t necessary or recommended. It’s designed to be enjoyed cold and creamy, so simply take it out of the fridge and serve chilled. If slightly firmer after refrigeration, letting it sit at room temperature for 10 minutes before slicing helps soften it to perfect eating consistency.
FAQs
Can I use a different sweetener instead of erythritol?
Absolutely! While erythritol is preferred for its keto-friendly and non-glycemic qualities, you can also use monk fruit sweetener or stevia blends that measure like sugar. Just adjust the amount to taste since some sweeteners are more potent.
Is it possible to make this cheesecake dairy-free?
While dairy is essential for that classic creamy texture, you could experiment with full-fat coconut cream and dairy-free cream cheese alternatives. However, the texture and taste might differ from the traditional version.
How long does the cheesecake need to chill?
For the best set and texture, chilling for at least 3 to 4 hours is recommended. Overnight chilling will only enhance the flavors and firmness, making slicing easier.
Can I add flavors like lemon or chocolate to this cheesecake?
Yes! Adding a teaspoon of lemon zest or a tablespoon of unsweetened cocoa powder to the filling mixture before beating creates delicious variations while keeping it keto-friendly.
Will this recipe work in smaller or larger pans?
You can adjust the recipe for different pan sizes, but keep in mind the thickness of the crust and filling will change. A smaller pan will yield a taller cheesecake, while a larger one will be thinner. Adjust chilling time accordingly.
Final Thoughts
This No-Bake Keto Cheesecake Recipe truly hits the spot when you want something indulgent yet guilt-free. It’s easy to make, requires no oven time, and pairs beautifully with any keto lifestyle. I hope you have as much fun making it as you will eating it—let this cheesecake become a staple dessert that you and your loved ones keep coming back to again and again.
Print
No-Bake Keto Cheesecake Recipe
- Prep Time: 20 minutes
- Cook Time: 0 minutes
- Total Time: 3 hours 20 minutes
- Yield: 8 servings
- Category: Dessert
- Method: No-Cook
- Cuisine: American
- Diet: Low Carb
Description
This No-Bake Keto Cheesecake is a creamy, rich dessert perfect for those following a ketogenic diet. Made with a buttery almond flour crust and a smooth cream cheese filling sweetened with erythritol, it requires no baking and is set in the refrigerator for a hassle-free treat.
Ingredients
Crust
- 1 1/2 cups almond flour
- 1/4 cup butter, melted
- 1 tbsp erythritol
Filling
- 16 oz cream cheese, softened
- 1/2 cup heavy cream
- 1/2 cup erythritol
- 1 tsp vanilla extract
Instructions
- Prepare the crust: In a mixing bowl, combine almond flour, melted butter, and 1 tablespoon erythritol. Stir the mixture thoroughly until all ingredients are well incorporated and the mixture has a crumbly but sticky texture.
- Form the crust: Press the almond flour mixture firmly into the bottom of a 9-inch pie dish or cheesecake pan, creating an even layer. Place the crust in the refrigerator to chill and set while you prepare the filling.
- Make the filling: In a separate mixing bowl, beat the softened cream cheese, heavy cream, 1/2 cup erythritol, and vanilla extract together using a hand mixer or stand mixer until you achieve a smooth, creamy consistency with no lumps.
- Assemble the cheesecake: Pour the cream cheese filling over the chilled crust, spreading it evenly with a spatula to cover the entire surface.
- Chill the cheesecake: Place the assembled cheesecake in the refrigerator for at least 3 to 4 hours to allow it to completely set and firm up.
- Serve: Once set, slice the cheesecake and serve chilled. Optionally, garnish with fresh berries or sugar-free whipped cream for extra flavor and presentation.
Notes
- Ensure the cream cheese is softened to room temperature for a smoother filling.
- Press the crust firmly to prevent it from crumbling when slicing.
- Do not rush the chilling process; the cheesecake needs sufficient time to set properly.
- Optional toppings like fresh berries or sugar-free whipped cream add a nice touch without adding carbs.
- Store leftovers tightly covered in the refrigerator for up to 5 days.


